Connecting External Monitor to FT-710
Connecting External Monitor to FT-710
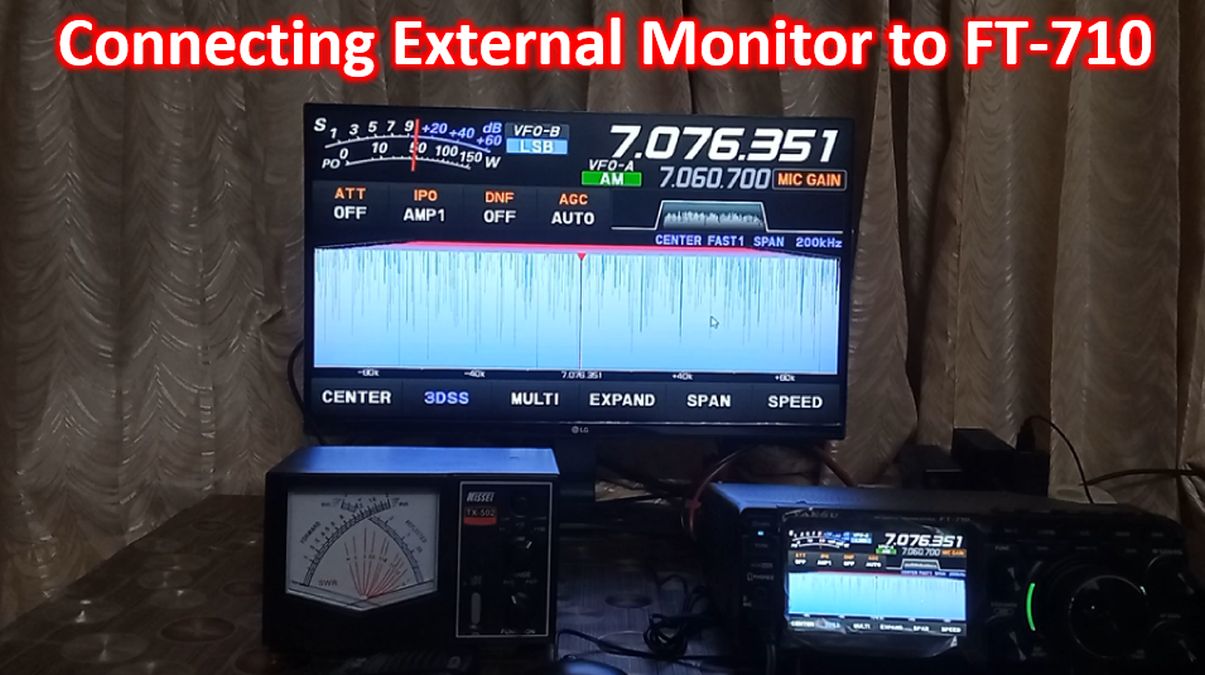
Connecting an external monitor is useful to see the screen of the FT-710 amateur radio much more clearly than in the small TFT screen of the radio.
Only DVI-D monitors and cables are compatible with FT-710. Though it possible to connect an HDMI monitor with a DVI-D to HDMI converter, one ham cautioned me against using it as it could lead to a blown fuse inside the FT-710. If that occurs, sending FT-710 back to the factory for repair is not an easy job in my region as we do not have a branch of the manufacturer over here. So a DVI-D monitor and cable were bought online. But simply connecting it to the DVI-D port and giving power did not work.
Function key of the radio had to be accessed to get the display settings and enable the external monitor. Pressing the function function key brings the options on the TFT monitor, from which you can choose the option from the touch screen function. As I had already connected a mouse to the Type A USB port at the back of the radio, I used a mouse for accessing on screen functions.
Though the initial setup is using the TFT screen, I am showing it again on the external monitor for better clarity. Display settings are seen at the bottom of the screen. On clicking it, the next screen will show the option to enable external monitor, which can be selected on TFT touch screen. Here I am showing the selection using the mouse for the demo. There are only two options for the resolution in the radio, though the monitor can support higher resolutions. I have opted for 800 x 600 pixels format. The dialogue box appearing on the external display can be closed only using the button at the lower part of the display as it is a function of the external display. You cannot click the ‘Close’ option shown in red using the mouse.
In this video clip I am testing out some of the options on the external display using the mouse. Changing the mode from LSB to USB, accessing the attenuator and changing attenuation levels and AGC are shown as examples. Only functions which are accessible on the TFT touch screen of the radio can be accessed using the mouse on screen. For other functions switches on the radio have to be used. They are several buttons and a function knob on the radio for intial access to bring them on TFT screen like mode and band. As there is only one Type A USB port only either mouse or keyboard can be connected at a time. May be a USB hub can be used to connect both together at the same time. But I am not trying to use it till I get confirmation from ham friends on some forum, as I have not seen it mentioned in the user manual!
Here you can see the power cord, DVI-D cable and Type A USB cable attached to the back of the radio.
This is a still picture of the Type A USB connector, DVI-D cable and Power cord connector plugged in.