How to Use hams.at for Posting Satellite Activations
How to Use hams.at for Posting Satellite Activations
Recently I came across hams.at as a useful website by WW1X. It was VU2TUM who posted his satellite activations posted at hams.at on our LEO Satellite Repeater Contact group. Now I have also started posting my satellite activations there as well as looking at satellite activations which I can work, from other operators.
Currently it is a beta version and new facilities are being added, which you can follow at the Twitter or X page of WW1X. After login and setting up your Maidenhead Grid location, this is the left side of the page which you see. Your grid location is displayed there. There are tabs for checking activations and passes.
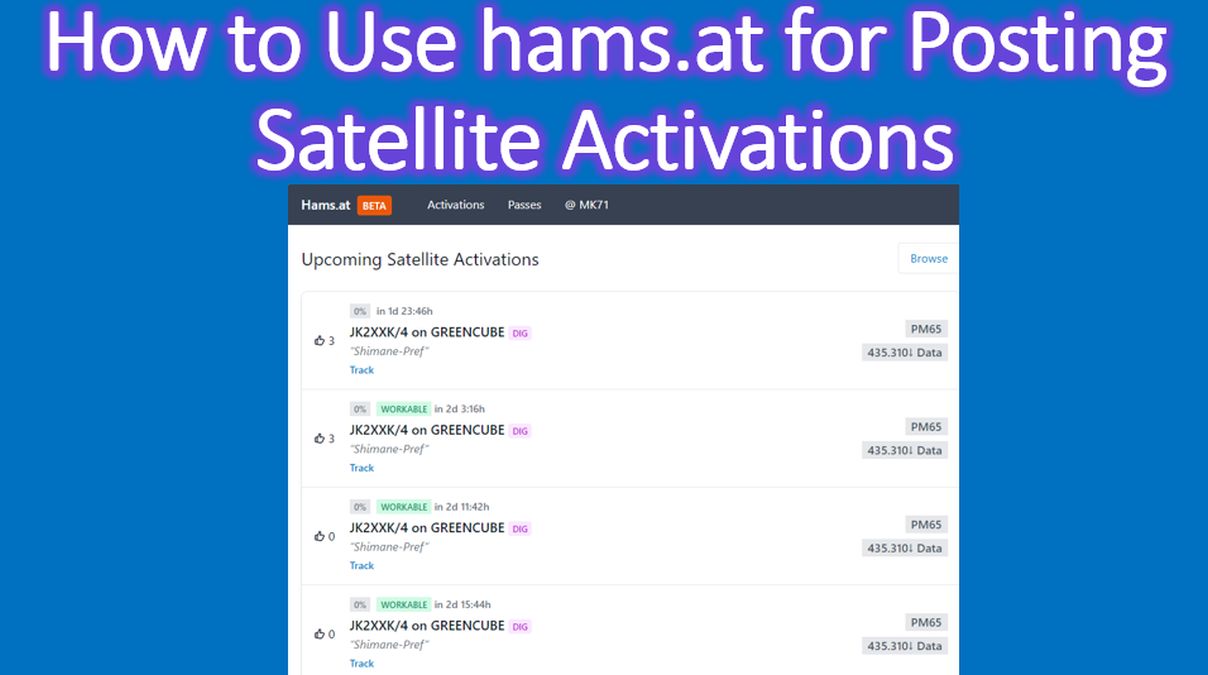
Then you see the upcoming satellite activations listed along with the number of thumbs up each has received. Your likelihood of contacting the station is displayed as a percentage at the top left corner above the pass, along with the time in which the pass is due. In my case, likelihood of even workable passes of digital and linear satellites will be shown as zero because I have set my preference as zero. That is because I have only an FM radio.
Callsign of the operator, satellite name and mode are displayed in one row. Mode of satellite operation, whether it is digital, FM, SSB or CW is also displayed next to the callsign. Grid, downlink frequency and whether the operation is by data, FM or SSB is displayed to the right of the callsign.
Any comment which has been added by the operator while posting the activation is visible below the callsign. There is a Track link below that which gives much more details of the activation.
Clicking on Track takes you to another page with a lot more options. Many of the features on this page are live. There is option to view on SatMatch and also to Post a Tweet at the top right corner.
Display of the upcoming time is live, along with before workable, workable and passed indications. Current azimuth, elevation and shortest path are also displayed live for both operators.
A map display is there on the right lower corner which shows both operators and the location of the satellite. The map can be zoomed in and out to check details.
Clicking on the Passes tab takes to you to a page displaying the upcoming satellite passes in your location with AOS in UTC, Satellite name, length of the pass, maximum elevation, azimuth direction and the link to post an activation.
A clickable button at the lower part of the page gives you an option to veiw the passes in next 6 hours, which can be used multiple times to view more passes.
If you wish to post an activation, you can click on the satellite pass of your choice and post details on the page. There is an option to choose whether to display uplink or downlink frequency. Special comments if any can also be added.
After you post the activation, next screen displays a map showing your location and the location of the satellite, along with elevation, azimuth and pass direction. There is also provision for editing the activation details even after you have posted it.
Settings for the website can be accessed from the top right corner. Activation match preferences allows you to set the minimum elevation of the pass for your end as well as the DX station. Below that there is provision to set the modes like SSB, CW, Data and FM. I have set all except FM as zero and FM as 100% as I have only an FM radio.
After setting the preferences, you can save them. There is also provision to change your email and login password at the bottom of the settings page. Links to all pages mentioned are available at my blog page, the link to which is posted in the description box of the video.